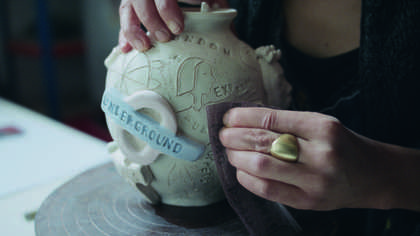
A bit of background
I simply found a wardrobe ... I stripped the interior ... turned it on its back, drilled some holes in the doors and filled it with plaster until it overflowed.
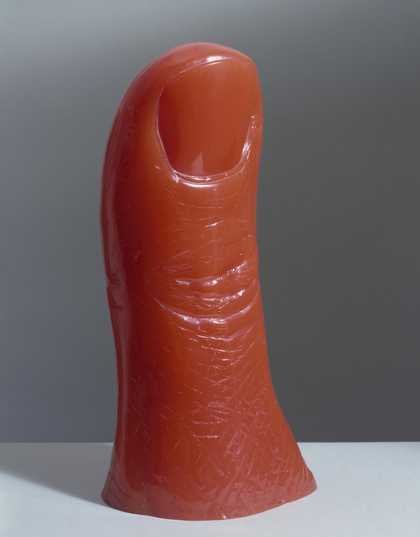
Rachel Whiteread
Rachel Whiteread uses industrial materials such as plaster, concrete, resin, rubber and metal to cast everyday objects and architectural space. Her works capture negative spaces and use familiar materials and objects in unexpected ways.

Rachel Whiteread
Untitled (Twenty-Four Switches)
(1998)
Tate

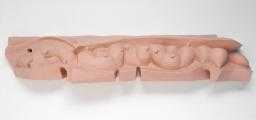
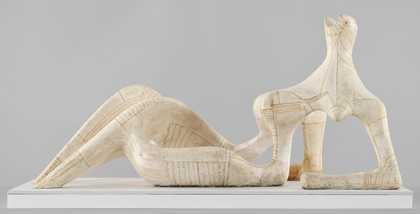
Rachel Whiteread
Untitled (Stairs)
(2001)
Tate
Cast like Rachel Whiteread
You can cast just about anything. For this how to, inspired by Rachel Whiteread’s use of domestic objects, we cast a light bulb. Watch the film to learn about making and casting with a two-part mould. If the film leaves you feeling really inspired, follow our step-by-step below and have a go yourself.
Step 1: Choose your object

Decide what you want to cast. For this method, we recommend choosing something not much bigger than your hands. If you’re trying casting for the first time, choosing something with a flat side will help.
Step 2. Make a clay bed

Lay your object flat on a surface. This surface will end up covered in clay and plaster dust so choose somewhere you don’t mind getting messy!
Put some clay underneath your object to secure it. Create a smooth and even bed of clay extending to 10cm around the object. The clay should reach half way up the object. This exposed top half of your object will become the first half of the mould.
Step 3: Block out a pouring hole, make a channel

Add a small piece of clay to your object at one end. If your object has a flat or thin end, choose that end! This will create the tunnel in the mould to pour in when it comes to the casting bit.
Using a clay tool, create a channel around the object. This will help the two halves of the silicone mould fit together.
Step 4: Build some walls

Roll clay out to 2cm thick. Cut into strips that are 10cm wide*. Attach these strips to the clay bed approx. 3cm away from the edge of the object, shaping the strips around the object. You have now created the container for pouring the silicone!
*these may need to be wider if your object is taller than our light bulb. To be safe, the wall needs to clear the top of the your object in the clay bed by 5cm.
Step 5: Mix and pour the silicone

First of all, grease the visible surface of your object in the clay bed. We used release agent but you could use petroleum jelly or cooking oil. This creates a barrier between the object and silicone so nothing gets stuck.
Following the instructions on the packaging, mix the silicone liquid and catalyst. Once it’s mixed, you have to act fast! Pour the silicone mixture over the object. Make sure there is between 0.5-1cm silicone covering the highest exposed part of the object.
Cover the entire thing in plastic sheeting to stop the clay drying out while the silicone dries.
Step 6: Build some more walls

Peel the clay walls for the silicone off. Rebuild a new clay wall, same thickness and height, 3-4cm away from the edge of the set silicone. You have now created the container for the plaster.
Step 7: Make registration marks

Make some registration marks in the clay. Think of these as little craters. They will become like jigsaw pieces when you slot both parts of the mould together. We used a clay tool but you could use a spoon or a knife.
Step 8: Mix and pour the plaster

Mix plaster and water according to the ratios on the packet. You will need roughly the same volume of each. Add plaster powder to water until the plaster settles on the top. Mix until it is the consistency of double cream. Pour the plaster over the set silicone to the top of the walls.
Step 9: Take down the walls, flip and clean

Take down the clay walls to reveal the plaster jacket and turn whole thing over. Remove all of the clay from the plaster, silicone and your object. This can be fiddly so you may want to use a tool you can scrape with. Then give your object a good clean.
Step 10: Fill the hole for the pouring tunnel

This step is very important! Before doing anything, make sure you fill the hole in the silicone at the base of the object with some clay.
Repeat!

Repeat steps 2–9 on the reverse side of the object. The wall building is a easier this time round. You can line them up with the edges of the set plaster and set silicone.
Remember to grease the set silicone and plaster parts before pouring!
Step 12: The first reveal

Crack open the two halves of the mould. You might need to use a knife for this. Ta da! Here is your two part mould.
Take your object out and give the silicone a clean.
Ready to cast

Congratulations on getting this far! You have now created a two part mould that you can use to create casts of your object again and again.
Step 12: Secure the mould

Clamp the two halves of the mould together. You could improvise with two pieces of board and some string, as long as the mould is secured tightly closed.
Step 13: Mix Jesmonite, pour and agitate

Mix the Jesmonite powder and catalyst according to the ratios on the packet. We used Jesmonite as it can be made to look like many things! You can add colour or textural elements to change the finish. We chose a few drops of green pigment.
Pour the Jesmonite mix into the mould from the pouring tunnel created with that little piece of clay!
Gently wiggle the clamped mould to make sure the Jesmonite has coated all parts of the mould. This will also help get rid of any air bubbles in the mixture.
Step 14: The finishing touches

Unclamp the mould and crack open the two halves. Here is your cast object! Remove it from the mould. You can slice off the cast tunnel. Use sandpaper to smooth any rough edges, usually at the join of the two halves of the mould.
The finished product